🚀硬件准备

以分辨率为 240x240 的 SPI 接口的 TFT 屏幕为例,其驱动芯片为ST7789,与ESP32的硬件连接如下图所示:

202204042140386

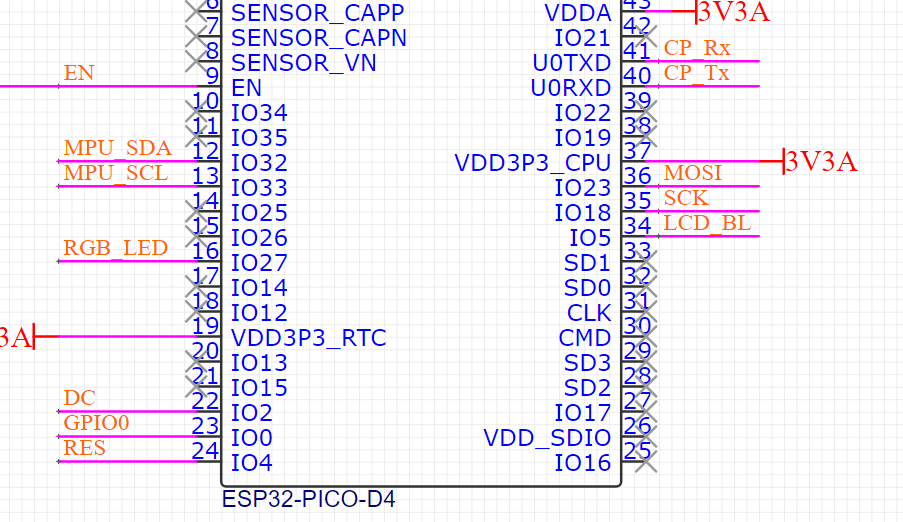
其中 DC 接到了IO2、RES 接到了 IO4、MOSI 接到了 IO23、SCK 接到了 IO18。

🚀User_Setup.h 文件的修改

首先选择对应的驱动芯片,取消其宏定义的注释。

🚀User_Setup_Select.h文件的修改

然后进入 User_Setup_Select.h ,找到对应分辨率和驱动芯片的头文件,取消其注释。

本次选择的是 Setup24_ST7789.h

🚀Setup24_ST7789.h文件的修改

进入 User_Setups 目录,找到并打开 Setup24_ST7789.h 。

修改分辨率和引脚即可。

🚀测试例程

1
2
3
4
5
6
7
8
9
10
11
12
13
14
15
16
17
18
19
20
21
22
23
24
25
26
27
28
29
30
31
32
33
34
#include <TFT_eSPI.h> 
#include <SPI.h>

TFT_eSPI tft = TFT_eSPI(); // Invoke custom library

void setup() {

tft.init();
tft.fillScreen(TFT_BLACK);

// Set "cursor" at top left corner of display (0,0) and select font 4
tft.setCursor(0, 0, 4);

// Set the font colour to be white with a black background
tft.setTextColor(TFT_WHITE, TFT_BLACK);

// We can now plot text on screen using the "print" class
tft.println("Initialised default\n");
tft.println("White text");

tft.setTextColor(TFT_RED, TFT_BLACK);
tft.println("Red text");

tft.setTextColor(TFT_GREEN, TFT_BLACK);
tft.println("Green text");

tft.setTextColor(TFT_BLUE, TFT_BLACK);
tft.println("Blue text");

}

void loop() {

}