以 LVGL 7.11版本为例
🚀资源下载
LVGL v7
lv_demos v7
TFT_eSPI
🚀环境配置
首先,用 VSCode 新建一个 Arduino 工程。
将上面下载的三个文件夹复制到工程的 lib 目录中。
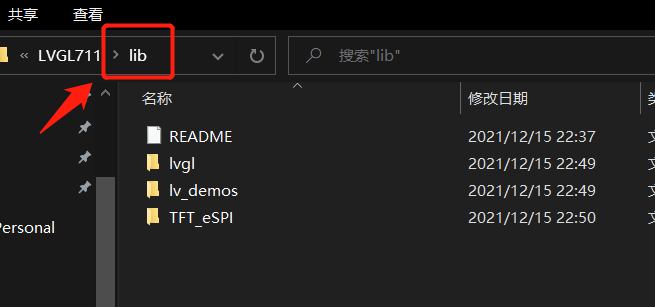
将 lvgl 目录中的 lv_conf_template.h 复制到这个目录,并将名字改成 lv_conf.h 。
将 lv_demos 目录中的 lv_ex_conf_template.h 复制到这个目录,并将名字改成 lv_ex_conf.h 。

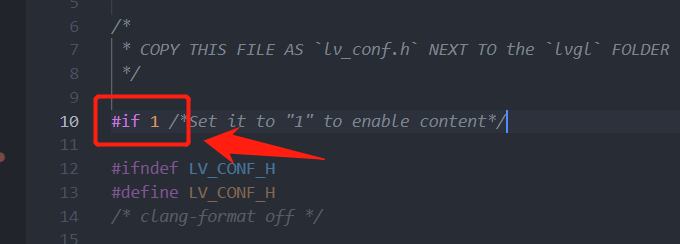
将 lv_conf.h 与 lv_ex_conf.h 里面的 #if 0 改成 #if 1 。
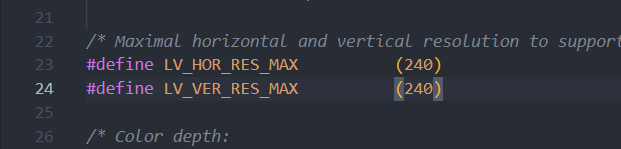
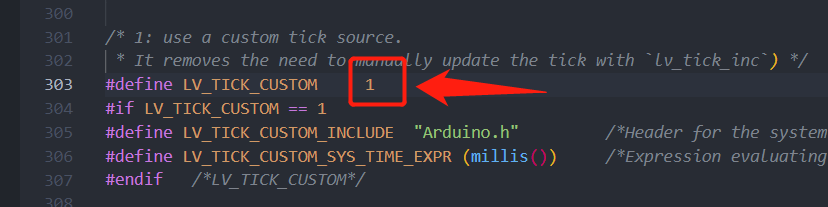
进入 lv_conf.h ,修改屏幕的大小。并使能用户时钟源。
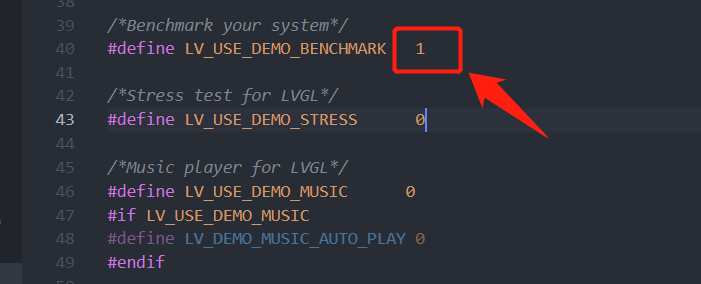
进入 lv_ex_conf.h ,使能相应的 demo 为 1 。
🚀验证程序
将下面的代码复制到 main.cpp 中编译下载,看看是否可以正确运行。
1
2
3
4
5
6
7
8
9
10
11
12
13
14
15
16
17
18
19
20
21
22
23
24
25
26
27
28
29
30
31
32
33
34
35
36
37
38
39
40
41
42
43
44
45
46
47
48
49
50
51
52
53
54
55
56
| #include <Arduino.h>
#include <lvgl.h>
#include <TFT_eSPI.h>
#include "lv_examples.h"
TFT_eSPI tft = TFT_eSPI();
static lv_disp_buf_t disp_buf;
static lv_color_t buf[LV_HOR_RES_MAX * 10];
void my_disp_flush(lv_disp_drv_t *disp, const lv_area_t *area, lv_color_t *color_p)
{
uint32_t w = (area->x2 - area->x1 + 1);
uint32_t h = (area->y2 - area->y1 + 1);
tft.startWrite();
tft.setAddrWindow(area->x1, area->y1, w, h);
tft.pushColors(&color_p->full, w * h, true);
tft.endWrite();
lv_disp_flush_ready(disp);
}
void setup()
{
Serial.begin(115200);
lv_init();
tft.begin();
tft.setRotation(4);
lv_disp_buf_init(&disp_buf, buf, NULL, LV_HOR_RES_MAX * 10);
lv_disp_drv_t disp_drv;
lv_disp_drv_init(&disp_drv);
disp_drv.hor_res = 240;
disp_drv.ver_res = 240;
disp_drv.flush_cb = my_disp_flush;
disp_drv.buffer = &disp_buf;
lv_disp_drv_register(&disp_drv);
lv_demo_benchmark();
}
void loop()
{
lv_task_handler();
delay(5);
}
|

 wechat
 alipay